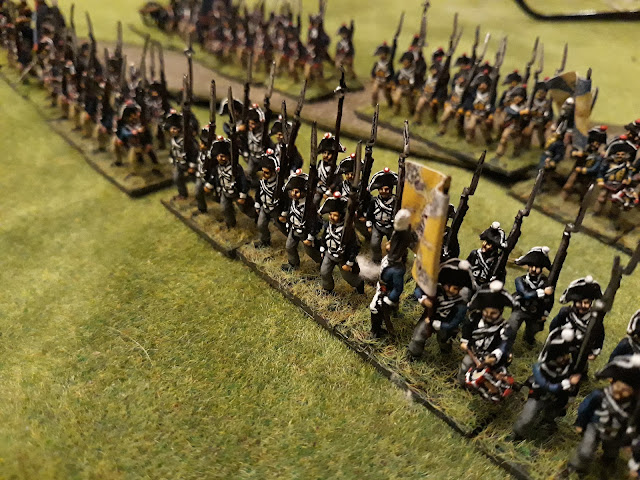
1813 Black Powder refight of the Battle of Hoyersweda. 15mm Napoleonic.
Introduction
My friend Paddy asked for a game set in 1813 to get his Prussian toys out in the sun. He suggested re-fighting a little-known battle called Hoyersweda where the lead division of Oudinots XII Corps got a nasty surprise one morning as it awoke to find its pickets being driven in by some fiery German types. Never one to shy away from an excuse to play my favourite Marechal de France, we arranged a date and got it sorted.
Marshal Oudinot's forces were based on those that were present historically, mainly the Division of Count Michel-Marie Pacthod with a Bavarian brigade in support. Paddy supplied the Prussians and the Malbec.

Here is an animation that i made for the re-fight (spoilers!)
Still quite new to the rules, I had a go at customising the troop stats to give a feel for the below-average troop quality on display in 1813.
Order of Battle
Commander-in-Chief: Maréchal Oudinot
|
Staff Rating:
8
+2 ATTACKS
| ||
Aggressive!. +1 to CR for charge order
|
Decisive! May re-roll failed Command check but if that fails it’s a blunder.
|
Independence: medium
| |
Brigade Commander: Général de brigade Bardet
|
Staff Rating: 7
| ||||||
Unit Name
|
Melee
|
Shooting
|
Morale
|
Stamina
|
Special Rules
|
Points 181
| |
4/1st Légère Regiment
|
6
|
3
|
4
|
3
| Note- not using pas de charge as i think the 1813 army was a shadow of its former sense in that regard |
36
| |
3/7th Infantry Regiment
|
6
|
3
|
4
|
3
|
36
| ||
4/7th Infantry Regiment
|
6
|
3
|
4
|
3
|
36
| ||
4/42nd Infantry Regiment
|
6
|
3
|
4
|
3
|
36
| ||
20/4th Foot Artillery
|
1
|
3-2-1
|
4
|
2
|
Veteran, reliable,Ellite 5+
|
37
| |
Brigade Commander: Général de brigade Cacault
|
Staff Rating: 7
| ||||||
Unit Name
|
Melee
|
Shooting
|
Morale
|
Stamina
|
Special Rules
|
Points
217
| |
3/67th Infantry Regiment
|
6
|
3
|
4
|
3
|
36
| ||
4/67th Infantry Regiment
|
6
|
3
|
4
|
3
|
36
| ||
2/101st Infantry Regiment
|
6
|
3
|
4
|
3
|
36
| ||
3/101st Infantry Regiment
|
6
|
3
|
4
|
3
|
36
| ||
4/101st Infantry Regiment
|
6
|
3
|
4
|
3
|
36
| ||
20/4th Foot Artillery
|
1
|
3-2-1
|
4
|
2
|
Veteran, reliable,Ellite 5+
|
37
| |
Brigade Commander: Général de brigade Jacquinot commanding the army reserve
|
Staff Rating: 7
| ||||||
Unit Name
|
Melee
|
Shooting
|
Morale
|
Stamina
|
Special Rules
|
Points
41
| |
Hessian cavalry
|
6
|
4
|
3
|
Marauder
|
41
| ||
2/4th Foot Artillery
|
1
|
3-2-1
|
4
|
2
|
Veteran, reliable,Ellite 5+
|
37
| |
Brigade Commander: Generalmajor Wolf
|
Staff Rating: 7
| ||||||
Unit Name
|
Melee
|
Shooting
|
Morale
|
Stamina
|
Special Rules
|
Points
126
| |
2nd Bavarian Light Infantry Battalion
|
4
|
2
|
4
|
2
|
Small. Unreliable -1,
|
33
| |
2/5th Bavarian Infantry Regiment
|
6
|
3
|
4
|
3
|
Unreliable -1,
|
33
| |
2/7th Bavarian Infantry Regiment
|
6
|
3
|
4
|
3
|
Unreliable -1,
|
33
| |
1st Bavarian Foot Artillery
|
1
|
3-2-1
|
4
|
2
| This was a large battery representing the 18 guns present. |
27
| |
Prussian forces based loosely on the forces present as follows
Commander-in-Chief: General lieutenant von Taünzien
|
Staff Rating: 8
| ||
Aggression:
|
Decisiveness: 1-3 normal, 4-6 high
|
Independence:
| |
1st Brigade Commander: Generalmajor von Dobschütz
|
Staff Rating: 7
| ||||||
Unit Name
|
Melee
|
Shooting
|
Morale
|
Stamina
|
Special Rules
|
Points
129
| |
Reserve bn
|
6
|
3
|
4
|
3
|
36
| ||
Militia bn
|
6
|
3
|
5
|
3
|
UNRELIABLE -1
|
33
| |
Militia bn
|
6
|
3
|
5
|
3
|
UNRELIABLE -1
|
33
| |
Foot Artillery
|
1
|
3-2-1
|
4
|
2
|
27
| ||
2nd Brigade Commander: Generalmajor von Lindenau
|
Staff Rating: 7
| ||||||
Unit Name
|
Melee
|
Shooting
|
Morale
|
Stamina
|
Special Rules
|
Points
234
| |
JAGER COMPANIES
|
4
|
2
|
4
|
2
|
Small. SKIRMISHER, SHARPSHOOTER, RELIABLE +-1, ELITE 5+
|
42
| |
Militia bn
|
6
|
3
|
5
|
3
|
UNRELIABLE -1
|
33
| |
Militia bn
|
6
|
3
|
5
|
3
|
UNRELIABLE -1
|
33
| |
Lutzow cavalry (HUSSARS)
|
6
|
4
|
3
|
MARAUDER
|
41
| ||
Silesian national cavalry
|
6
|
4
|
3
|
LANCER, MARAUDER, UNRELIABLE -1
|
32
| ||
Horse Artillery
|
1
|
3-2-1
|
4
|
1
|
MARAUDER
|
26
| |
Foot battery
|
1
|
3-2-1
|
4
|
2
|
27
| ||
8th Brigade Commander: Generalmajor Hünerbein
|
Staff Rating: 7
| ||||||
Unit Name
|
Melee
|
Shooting
|
Morale
|
Stamina
|
Special Rules
|
Points
241
| |
1/12th Reserve Infantry Regiment
|
6
|
3
|
4
|
3
|
36
| ||
2/12th Reserve Infantry Regiment
|
6
|
3
|
4
|
3
|
36
| ||
3/12th Reserve Infantry Regiment
|
6
|
3
|
4
|
3
|
36
| ||
4/14th Silesian Landwehr Infantry
|
6
|
3
|
5
|
3
|
UNRELIABLE -1
|
33
| |
Brandenburg Hussar Regiment
|
6
|
4
|
3
|
MARAUDER
|
41
| ||
3rd Silesian Landwehr Cavalry
|
5
|
4
|
3
|
MARAUDER, LANCER, UNRELIABLE -1
|
32
| ||
Heavy Artillery
|
1
|
3-2-2
|
4
|
2
|
27
| ||
 |
| Prussians right of frame, French on the left. It is a narrow battlefield split by the river and marsh in the middle. |
 |
| Bardet's Brigade begins the game deployed in the Bergen Hamlet, with the river on their left flank. The Bavarians are in support behind at Seydenwinkel. |
 |
| The Prussian first Brigade waste no time and attempt to storm the town of Bergen, skirmish and artillery fire throwing the surprised defenders into disorder. |
 |
Across the river,the rest of the French troops of Cacault's Brigade are in columns of march as they enter the outskirts of Hoyersweda, hoping to quickly push through the town and advance towards Nardt. Its a race against time to get reserve troops deployed onto the plain.
|
 |
| The brave 42nd Ligne hold the Prussians at bay for one round of melee but struggle to hold on as two Prussian columns attack Bergen from different sides. |
 |
| The rest of the Prussian Brigade throws itself at the french Line to prevent it reinforcing the village. Only point blank cannister fire halts their charge. |
 |
| Prussian reinforcements of the 2nd Brigade arrive at Neuweise and begin to advance in support of the attack. if they can move forward they can outflank the French 1st brigade currently pinned. |
 |
| But no, their commander rolls a blunder and their pace drops to a crawl! |
 |
| This creates a perfect opportunity for Oudinot over at Hoyersweda. If he can quicken the pace of the brigade to get through the town... |
 |
| ...so he orders his subordinate En Avant! but Cacault duly roles a blunder too! His columns slow down as they decide to loot the town en route! |
 |
| With Bergen in Prussian hands, cavalry gallops forward in rapid support. |
 |
| The French plan to retake the village using the Bavarian brigade, however, (you may see a pattern developing here) only half of the brigade (light Batalion and artillery) succeed in moving forward, as the two line Regiments decide to move backwards due to another blunder! |
 |
| With perfect timing, the Uhlans wipe out the Bavarian guns as soon as they unlimber. Terrible shooting! |
 |
| Over in Hoyersweda, Oudinot decides to take command away from his insubordinate brigade Commander and orders Cacault's Brigade to quicken their pace, personally issuing a brigade order... |
 |
| ...you guessed it...another blunder limits them to one move again! |
 |
| Overview. Top left the battle at Bergen. Top right the useless Bavarians. Bottom right, the traffic jam that is Hoyerswada. |
 |
| With the village of Bergen lost, support destroyed and reinforcements nowhere to be seen, the French manage to conduct a parade ground withdrawal to Seydenwinkel. Wine glass added for scale. |
 |
| Seydenwinkel becomes a hasty defence line. |
 |
| Seydenwinkel., French troops catch a breather and rally back some points, |
 |
| Across the river, Oudinot finally begins to get hid troops in order as they clear Hoyersweda. |
 |
| French reserve battery and cavalry arriving along the road in the centre as the Prussians fail top get attack orders through at Neuwiesse (beside the wine glass ! ). |
 |
| Just in time, as a fresh Prussian Brigade, the 8th, appears in front. |
 |
| The Prussian 8th brigade quickly deploys. |
 |
| Across the river, Oudinot redeploys into attack column. |
 |
| The Prussians blunder again and fail to move from the Wassenburg Mill, above left. Final french reserves bolster the SEYDENWINKEL DEFENCE - MUCH NEEDED ARTILLERY IN THE FORM OF A 12LB BATTERY AND cavalry support in the form of a single HESSIAN REGIMENT. |
 |
| Attempting to repeat the real history, Prussian cavalry assault Oudinot's artillery. This time, however, they are blown to bits. |
 |
| 8th Brigade deploy into line, Jagers move to sting the enemy ahead. |
 |
| The battle is in the balance, the Prussians have the upper hand. In times like this its best to roleplay the General you command. Being Oudinot - the Marshal wounded 37 times in his career and who wasn't gifted in the strategy department- I elected to charge with the brigade and five attack columns crashed into the wood. |
 |
| The first row engages, the second gives support. |
 |
| Volleys hit home but the attack pushes on. |
 |
| A 12lb battery is taken, its crew bayoneted. |
 |
| Oudinot leads a battalion assault personally, adding two combat dice to the mix. |
 |
| Across the river, the Prussians become disjointed as the troops beside the river advance but the 1st brigade in Bergen refuse to support them. |
 |
| The French heavies have an obvious choice of target.... |
 |
| ...and the leading Prussian unit is shredded by their fire |
 |
| Meanwhile, Oudinot heroically routs the enemy unit he engaged in melee, but takes woeful losses. |
 |
| The fighting in the woods continues for a second round, troops are flung back only to charge again! This time routing their opposite numbers. |
 |
| The French unit that destroyed the Prussian heavy guns has no time to celebrate. As the smoke clears, it finds itself disordered and facing a Prussian Hussar regiment only a small distance away. |
 |
| Perhaps unsurprisingly at this stage, the Prussian Cavalry blunders and then rolls a two meaning they have to retreat. Phew! |
 |
| Oudinot in his moment of triumph! |
 |
| Before being instantly routed.... |
 |
| ..and killed in the final Prussian volley of the game. |
 |
| Prussian resistance on this flank melts away as the 8th Brigade takes to its heels, the French march around Oudinot's corpse to take Nandt. |
 |
| Paddy knows when he is beaten but whenever he is, he enjoys extricating as many troops as he can in as orderly a manner as possible. That's a real gamer for you and always scares the heck out of me as the best way to extricate ones infantry and cavalry is to swamp the enemy line with your cavalry. Today looks like being no exception! |
 |
| True to form, Paddy blunders again but this time it works in his favour as his cavalry brigade get three moves and career forward into my guns.... |
 |
| ..and into the infantry who are licking their wounds whilst hiding in a sunken lane. Luckily the cavalry bounced off. |
 |
| Accurate artillery fire disorders and decimates the cavalry. |
 |
| and the brigade is forced back., disordered. |
 |
| Time for the only cavalry unit on the French side to attack. |
 |
| and the Hessians sweep away the first brave Prussian regiment (what was left anyway)... |
 |
| ... before breaking through onto the second one and routing them both. |
 |
| However, they had done their job and the majority of the 1st and 2nd Prussian brigades slipped away unmolested. |

Aftermath.
A close run thing and incredibly similar to how the real battle panned out. If the Prussians could have followed up their initial success at Bergen to take Seydenwinkel then the game was theirs, but it was not to be.
A series of blunders by both generals created a different outcome, which is why we are a fan of these rules. Anything that adds chaos is good, whether it be blunders or charging to ones death in a winning charge.
What should I have done differently? What would you have done? Please answer in the comments.
Was the animation helpful?
We plan to do an 1807 game next month.


Great looking game
ReplyDeleteThats very kind, thank you Neil.
DeleteHey, what's not to like here? Fantastic report...a useful animation, wonderful terrain, buildings and figures, and an intense battle...Excellent!
ReplyDeleteMany thanks Phil, the animation was fun to learn, I'll do some more Napoleonic reports in the near future.
DeleteGood looking game and great AAR, always good to see the Orbats available.
ReplyDeleteTony.
Many thanks Tony, I hope the orbats show up ok, they look good on big screen but a bit mashed on mobile.
DeleteThis comment has been removed by a blog administrator.
ReplyDelete