1806 Napoleonic Battle of Halle Refight AAR
This month's game was a straight refight of the battle of Halle on October 17th 1806 as Marshal Bernadotte strove to undo the damage done to his reputation in recent engagements.
15mm Black Powder Rules.
French objectives- Seize Halle and prevent the enemy force from leaving.
Prussian objective - Hold Halle if possible and then march North to unite with the other Prussian forces who are reeling from their recent defeats at Jena and Auerstadt.
The Prussians are allowed to begin moving troops North only after the French clear the town.


A French victory without doubt. They flooded forward with great speed and used their superior skirmishing skills to great effect. We knew that would be the case - the issue was whether the French could repeat history and force the Prussian force away from its rendevous with friendly forces in the North.
Yes. Yes they could!
The scale of their victory depends on what state the Prussian force would be able to muster the following day. to that end, I managed to only withdraw a few troops to the North, the rest being destroyed or forced to retreat on a road that would lead them away from the rendevous point.
Two cavalry, two infantry and one artillery units managed to retreat via the North road. (Success)
Three infantry and two artillery units managed to retreat via the West road. (Failure)
Two infantry and one artillery unit managed to retreat via the South road.(Failure)
Two infantry and one artillery units were captured.
Three infantry units were destroyed.
We both agreed, at least, that the French force had been gutted and would find it hard to follow up on the next morning. That job would fall to the other troops of Bernadotte's command who were following up.
15mm Black Powder Rules.
Research and background material.
The background to the battle can be found here, written by my opponent Patrick Wilson.Briefing and objectives.
The game will last nine turns and our aim is to refight the original battle using the orders of the day.French objectives- Seize Halle and prevent the enemy force from leaving.
Prussian objective - Hold Halle if possible and then march North to unite with the other Prussian forces who are reeling from their recent defeats at Jena and Auerstadt.
The Prussians are allowed to begin moving troops North only after the French clear the town.
 |
| Halle in the centre, the Prussians deployed outside(top), leaving a small garrison which has been driven in to the town square by the advancing French troops (bottom). North is left, as you look at the picture., South flank is where the white cup is. |
 |
| Prussian cavalry, great troops but not well led. |
 |
| Prussian Grenadiers line the gardens to the east of Halle. |
 |
| Prussian Light troops were formed up in the main square in Halle. In the real battle, there had been a running battle for a couple of hours to get to this point. We decided to start the game at this point for lack of room. |
 |
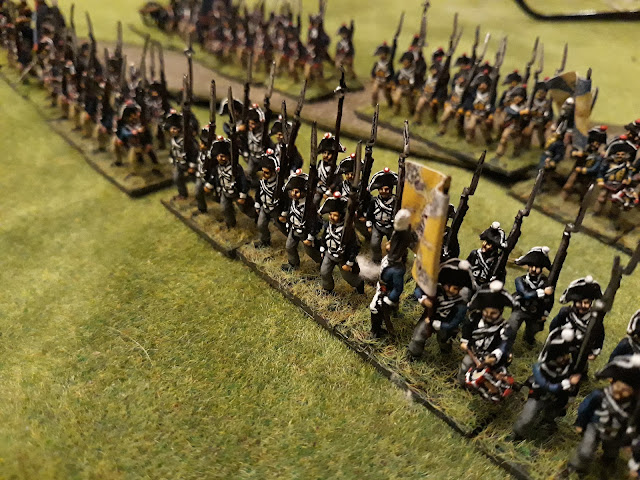
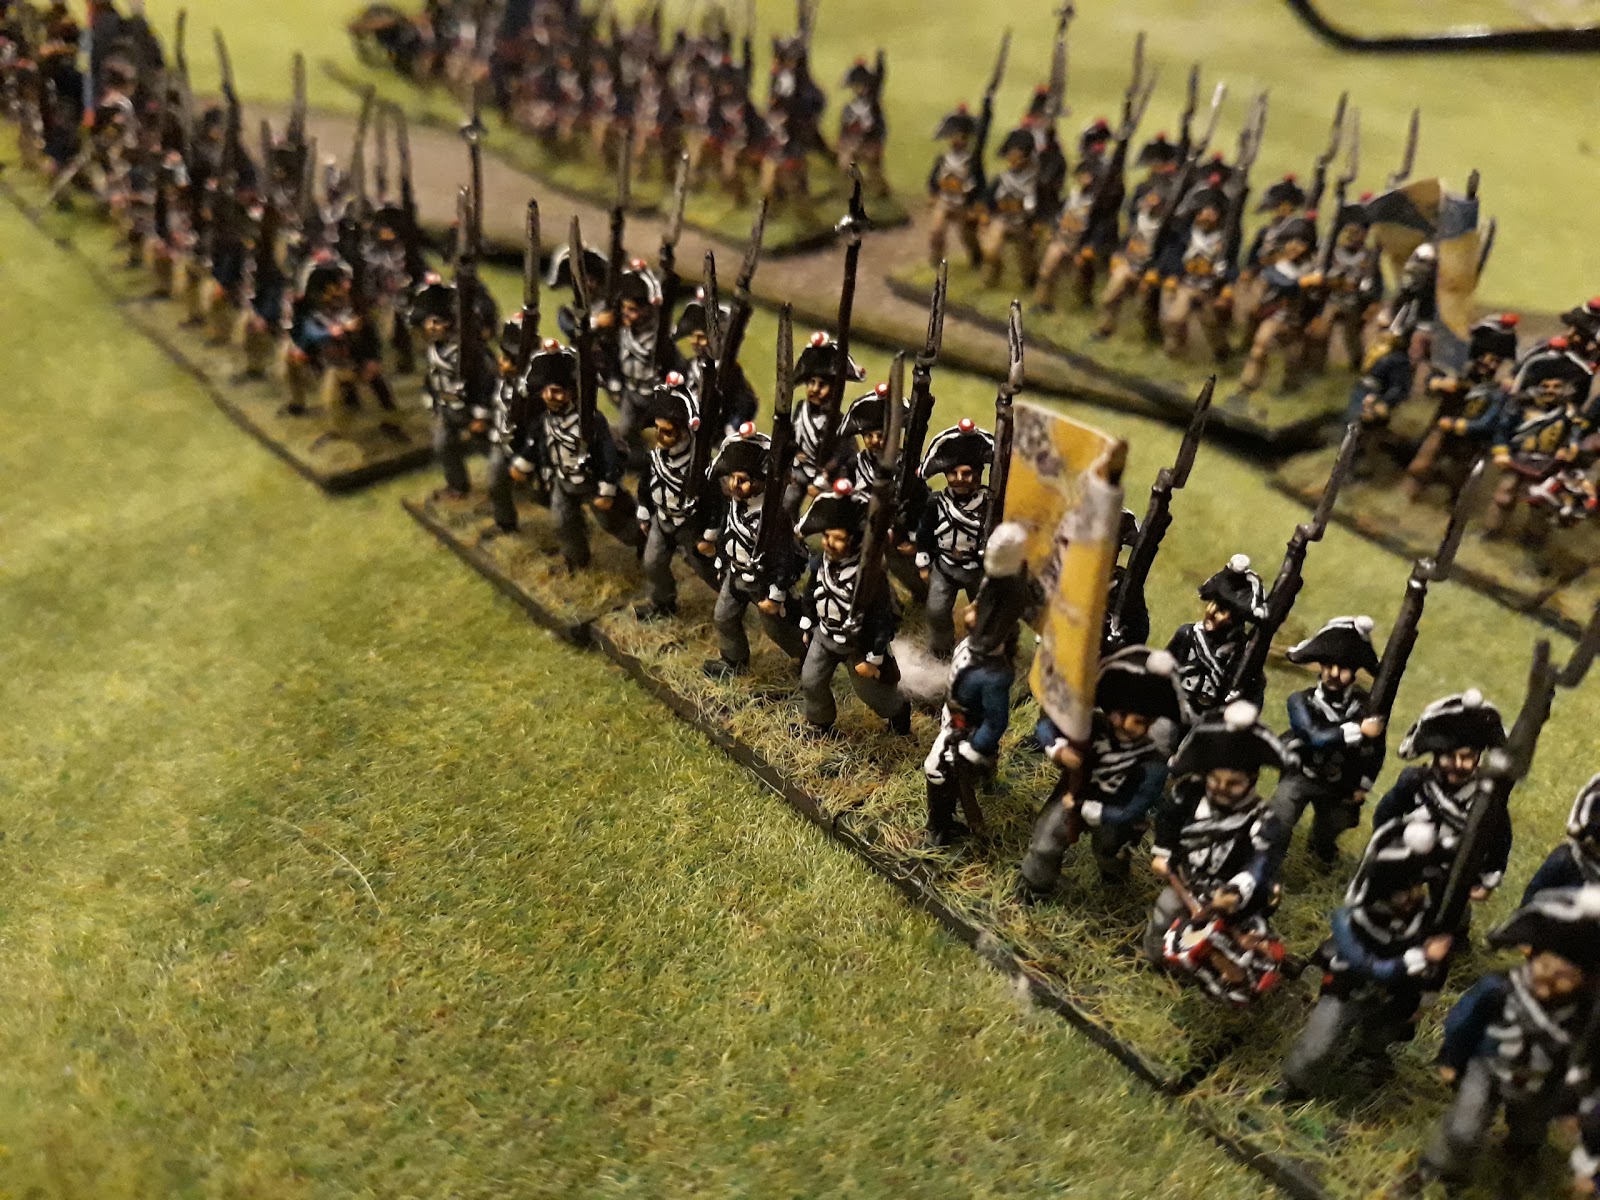
| A chance to use my new French infantry and some old cavalry, freshly rebased. |
 |
| Some of my AB Prussians that formed the center and left..We were using the new Age of eagles book for Black Powder which really limit how "Regimental" armies can operate. They basically struggle to coordinate any sort of movement above regimental level. This was a welcome improvement - realistically reflecting the different systems on show at the time. (French command and control and staff professionalism were far superior in 1806). |
 |
| The Prussians are deployed in two unwieldy infantry brigades and one light cavalry brigade. for full order of battle check the notes here. |
 |
| Paddy's Minifig Prussians formed the troops on the Southern flank. |
Turn 1
 |
| The French commanders were all 8CR, the Prussians were all 6CR. True to form, paddy rolls snake eyes on his first roll of the day meaning his French Infantry got three moves and pushed into the town. French general Dupont commanded this division - he would become more famous for a certain battle in Spain. |
 |
| They were met by Prussian light troops and a fierce fight ensues. |
 |
| Much disorder as the town square erupts in chaos. |
 |
| The Prussians, overwhelmed by the furious French assault, fall back. |
Turn 2
 |
| The French continue to pour troops into the town, hoping to break into the open country beyond. The Prussian light troops are re-engaged in meleee. |
Turn 3
 |
| The French get three moves again! The 1st brigade (legere) crosses into the town, whilst the 2nd brigade continue to fight the Prussian lights in the Northern outskirts of Halle.. |
 |
| The French 3rd brigade push out into the gardens and discover the Prussians ready and waiting for them. |
 |
| As happened in the real battle, the French deploy their skirmishers who are unopposed because the Prussian lights have been thrown away piecemeal trying to hold the village and waterways earlier. |
 |
| The Voltigeurs inflict significant loss on the tightly packed Prussian Grenadiers. |
 |
| The French 1st Brigade (legere), quickly leave the town and fan out to the South of the town. |
 |
| At this time, the Prussian commanders realise the town is lost and begin to think about fulfilling their orders (as per historical scenario) - to get as many troops off the battlefield as possible. The problem is that they must leave by the Northern table edge. This means disengaging and marching across the field. No mean feat with an antiquated order system because... |
 |
| ..the centre is already engaged.... |
 |
| ...and the commander on the South decides to do nothing... |

 |
| However, the brigade in the centre get three moves (snake eyes again), and begin to withdraw its first regiment. The front line will stay in place if engaged, whilst the second line tries to form march columns and march North. |
 |
| Its just a case of keeping the enemy at bay. |
 |
| The Prussian Fusiliers valiantly fight on for a third round of melee, pinning back a whole brigade, - buying vital time. |
Turn 4
 |
| Unopposed by enemy skirmishers, the entire french 32nd regiment forms a Grande Bande and snipes from the hedgerows. |
 |
| Horse artillery add their weight... |
 |
| The French 9th Legere regiment also forms Grande bande and commence heavy skirmish fire. |
 |
| French firepower disorders some Prussian artillery. |
 |
| ...and the Prussian light troops finally buckle under the pressure. A heroic effort! |
 |
| French firepower meets Prussian firepower ! |
 |
| Nothing I can do but take it as Prussian orders attempt to disengage units one at a time. |
 |
| One regiment manages to head North. This Prussian army was seen as the last untouched reserve following Jena and Auerstadt - it was hoped it could act as a rally point to unite the survivors of those battles and enable the Prussian army to regroup around its flags. If i can manage to get my forces North i can change history! |
 |
| ..if only the damned French would slow down a bit and stop with all that noisy shooting. |
 |
| Whats all this French tactical flexibility about?! Form full skirmish you say? How cowardly... kindly stand still so that my perfect lines can shoot you please. |
Turn 5
 |
| The way is now clear to allow the French cavalry brigade to exit the town by the Northern gate, with a regiment of foot in support. |
 |
| Fire now spreads all along the line.. |
 |
| The French skirmish line gets a bloody nose at this point. Paddy figures out its more effective to skirmish from medium range so pulls back slightly. Prussian orders not getting through. |
 |
| The French 32nd Ligne buckle and bolt under the pressure. A welcome respite for my line in the centre. |
 |
| My hussars (who had been given a reaction order earlier) dash into the impetuous French hussars who are in march column as they leave the town. This new rule was well received by all except the French hussars. |
 |
| On the Southern flank, the Prussians finally begin moving regiments North as the C-in-C takes personal control. Its a slow process as they get activated one at a time. |
 |
| Prussian firepower ruins the French Horse artillery's day. |
 |
| The french hussars are soundly trounced. |
 |
| ...five hundred french cavalry begin a steeplechase. |
Turn 6
 |
| On the northern outskirts, the French form squares as they laugh at the Hussars. |
 |
| The traffic jam in the town. as reserves flood in.. |
 |
| The Prussian cavalry press forward to pin French on the north of the town, hopefully to enable the friendly Infantry a funnel to head north behind them. |
 |
| Disaster! the Prussian Holman Grenadiers rout after massive losses from skirmish and artillery fire. |
 |
| Followed immediately by the Aulde Reisch regiment who roll double one on morale of course. |
 |
| So a hole appears as the Prussian front line in the South/centre dissolves, exposing the second line as it tries to march North. |
 |
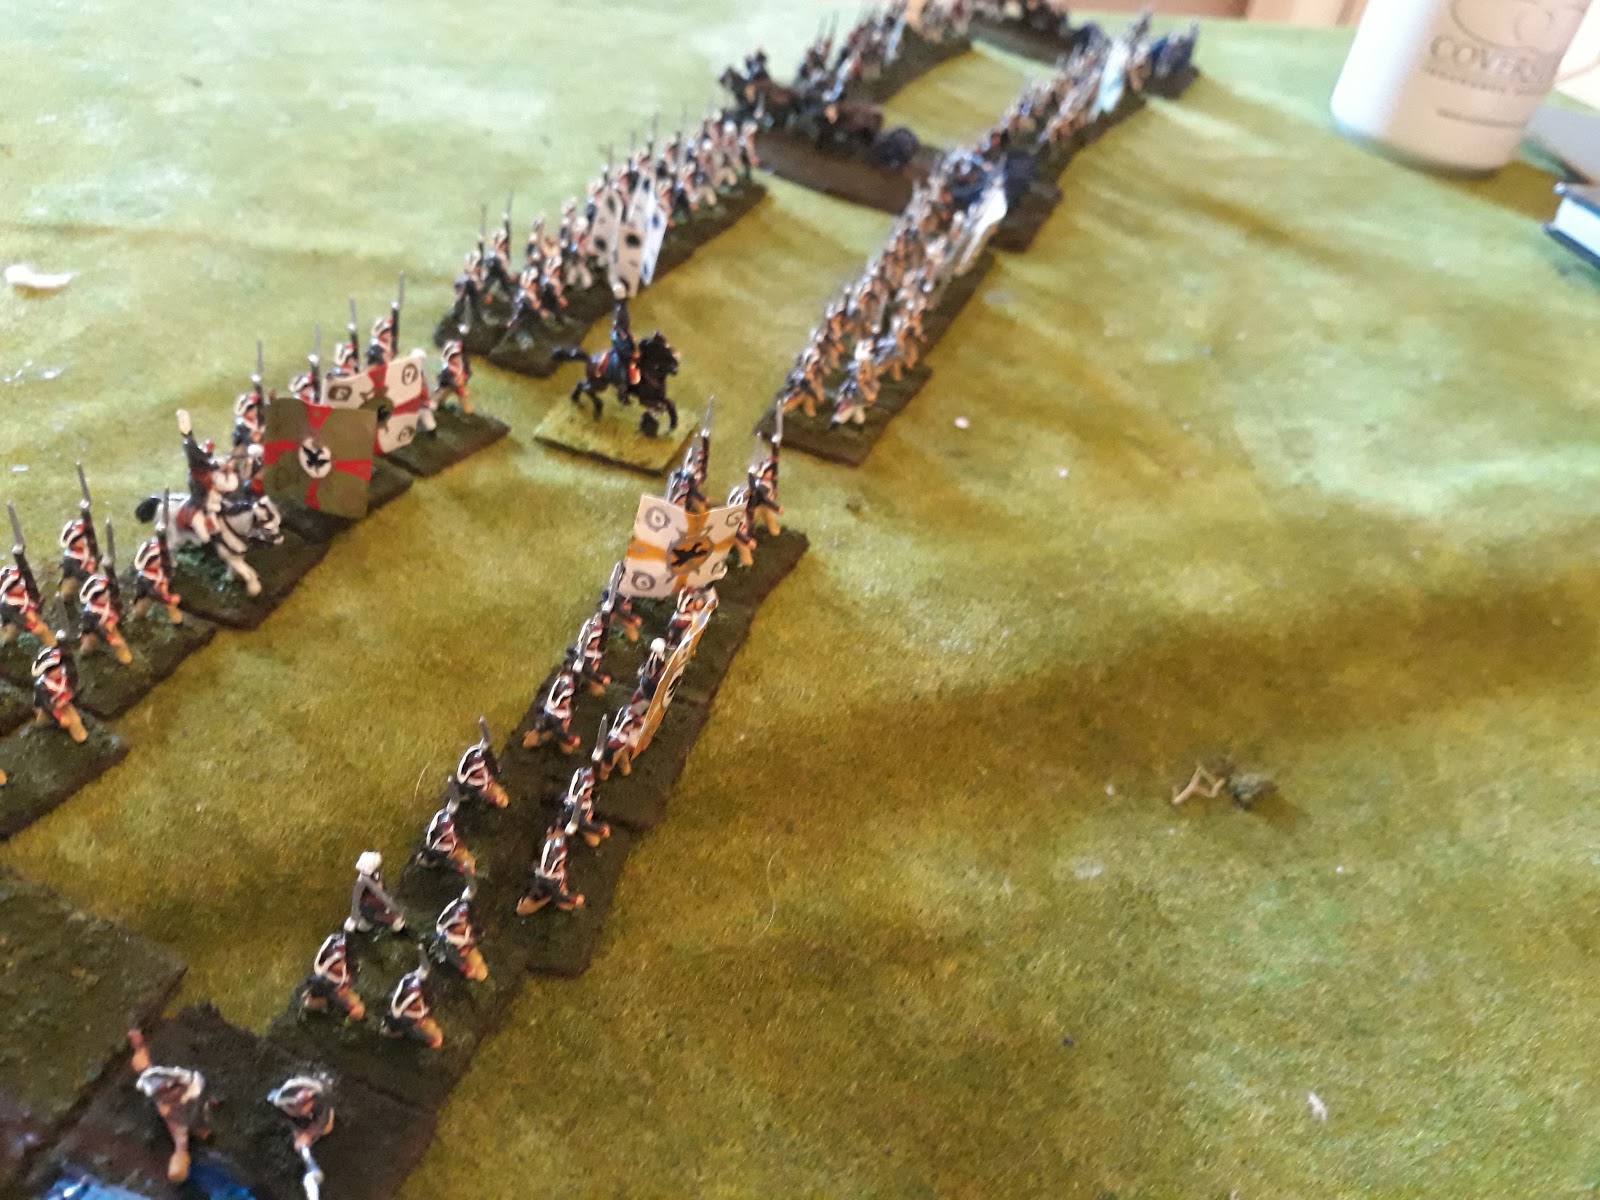
| Here we see an overview, troops at bottom of shot (North) are the troops marching off, covered by the cavalry I decide to drink more wine to compensate.. |
 |
| The march of shame. |
 |
| Troops in the centre are now exposed as the front line troops are gone... |
 |
| On the Southern flank, The c-in-c Wurtemburg intervenes and attaches to a unit and manages to lead it from the field using the Southern road. This is not the preferred route and these troops will not be of much use strategically to the Prussians tomorrow. But they will be alive. |
 |
| A musketeer unit is left as rearguard on the Southern flank, with only its regimental guns as support. |
 |
| The French Horse guns are routed at last. |
 |
| In the South, the 1/9th Legere is almost ruined but valiantly throws an eleven for morale! |
Turn 7
 |
| In the centre, the French are very fatigued but manage to push forward Votigeurs to try to slow the escaping Prussians and prevent them dragging off the guns. |
 |
| French reserves now have room to spill into the outskirts. |
 |
| ...they create a problem for the Prussian Light Cavalry. |
 |
| Artillery finds its mark. |
 |
| French musketry - ouch. |
 |
| I manage to pull out three battalions and a battery this turn.. |
 |
| Whilst more troops disengage and follow.. |
 |
| The Prussian light cavalry (bottom) have been forced to retire. My centre is holding, but its very bloody. |
 |
| My troops in the South are all either destroyed or marched off. Here, the final rear guard retires to the South. |
 |
| My c-in-c fails to get a battery to follow him. ... not quite possessing the charismatic air of his counterpart. |
 |
| Besides, the battery was too busy shooting... |
 |
| ..and managed to rout a French infantry unit to its front. This breaks the French 2nd Brigade which is forced to retire in the centre. |
Turn 8
 |
| But this only allows a fresh brigade to march forward.... |

 |
| My c-in-c finally persuades the battery to move, though it must flee on the West road. |
 |
| The French light troops fail to get orders, opting to not persue. The French broken brigade retires behind it. |
 |
| My steadfast infantry and artillery fires in style as my rearguard in the centre continues to fight hard. |
 |
| The entire French front line is disordered as they witness the death of General Dupont in their midst, killed by a shell. With Dupont dead, will the Spanish campaign be destined for success? |
 |
| More good fortune as another unit of the 9th Legere fails morale and routs. |

Turn 9

 |
| The firefight continues, both sides showing much disorder at this point but crucially the French have been held... |
 |
| French cavalry get orders to try to outflank to the North. |
 |
| A fresh French regiment bursts from the town and flanks the rearguard. |
 |
| In a titanic effort, the Prussians manage to march another regiment northwards. |

 |
| ..then another follows in their wake. |
 |
| The c-in-c succeeds in getting a final battery to limber up and follow him off to the west at a good pace! |

 |
| The race is on as French reserves flank the rearguard as Prussian troops are urged Northwards. |
 |
| A Brigadier takes the decision to move this unit off via the west road as time is running out. |

 |
| A nearby regiment realises theres no time left to flee North so doubles back to take the road west. |

 |
| Cavalry rattle their sabers in a show of bluff and counter bluff. |
 |
| Bernadotte finally completes the rallying of his central Brigade. |


 |
| The rearguard surrenders, it can do no more as the French creep around its flank. Its sacrifice has saved the face of its general. |
 |
| Bernadotte claims a resounding victory. |
Conclusion
A French victory without doubt. They flooded forward with great speed and used their superior skirmishing skills to great effect. We knew that would be the case - the issue was whether the French could repeat history and force the Prussian force away from its rendevous with friendly forces in the North.
Yes. Yes they could!
The scale of their victory depends on what state the Prussian force would be able to muster the following day. to that end, I managed to only withdraw a few troops to the North, the rest being destroyed or forced to retreat on a road that would lead them away from the rendevous point.
Two cavalry, two infantry and one artillery units managed to retreat via the North road. (Success)
Three infantry and two artillery units managed to retreat via the West road. (Failure)
Two infantry and one artillery unit managed to retreat via the South road.(Failure)
Two infantry and one artillery units were captured.
Three infantry units were destroyed.
We both agreed, at least, that the French force had been gutted and would find it hard to follow up on the next morning. That job would fall to the other troops of Bernadotte's command who were following up.


Excellent report and great looking game
ReplyDeleteCheers Neil!
DeleteFantastic looking game!
ReplyDeleteThanks Michal!
DeleteAbsolutly superb, congrats for the pictures : fabulous figures and town (love the wonderful town pics...with the traffic jam!), congrats for the write up, and congrats to Bernadotte!
ReplyDeleteThanks Phil, it was a rather unique experience trying to conduct a fighting withdrawal like that.
DeleteBeautiful collection and excellent set up.
ReplyDelete